Online whiteboards have been used widely for a long period of time, and have shown to be very useful tools especially for communicating ideas, visualization of thoughts, creating plans, organizing and delegating work, and much more, but all of that done with transparency since everybody can see the whiteboard.
There are many online whiteboards out there, and one that we have used is Miro. Since we are Agile practicing and promoting community, some of the usages of Miro that are applied in agile product/software development are live collaboration, voting on ideas, brainstorming and visualization of ideas, organizing all agile events, tracking of work completed, product vision and roadmap, etc…
This is a reminder of some of the basic features that I find useful, but believe me there are many more, I am not even scraping the surface.
Primarily to move within the Miro board you use your mouse cursor or you use your track pad with your fingers. You can make manual setting, by selection the settings option in the toolbar in the upper right corner of the board, and then you select Navigation mode.
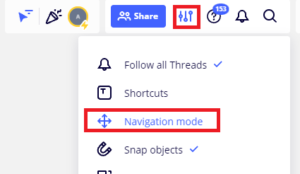
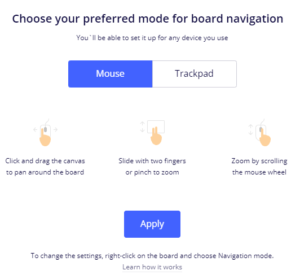
But Miro has AI that can detect on its own what you are using, and will adjust settings on its own.
You can move within a board when you cursor is a hand, that way you do not move or change any content on the board, but you are just exploring it. When your cursor is an arrow you can do the same, but you need to press space.
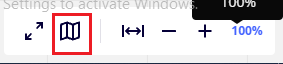
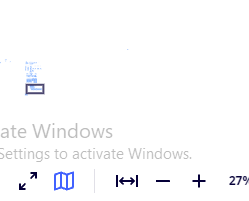
Also scrolling up or down would zoom in or zoom out the view of the board. Another way to manage navigation on the board is by using the map feature located at the lower right corner of the board (hover over the % and a toolbar will rollout towards left)
-Stickers
This option can be found on the toolbar on the left hand side of the board
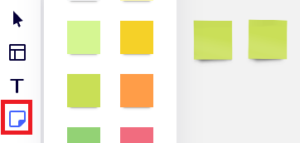
Stickers could be used for many things, in Agile practices for example they are used to write PBIs/User Stories as part of the Product Backlog. They could be different in colour, size, and also have an option to write text within (by double clicking the sticker), in different fonts and sizes, alignment, also the text could be highlighted, in different colour, with coloured background. You can also insert an active link, tag people so they know that the particular sticker is referring to them, add emojis and reactions, lock the sticker so no changes could be done to it.
Since you can also use the stickers to take notes during meetings (eg. Review or Retrospective), and you need to write fast, you can use a shortcut to open new sticker by simply clicking TAB button on the keyboard while the cursor is still blinking in the sticker where we were writing before.
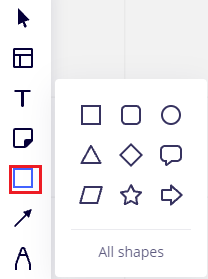
– Shapes
This option can be found on the toolbar on the left hand side of the board. Shapes are stickers in different forms and have the same edit options like the stickers.
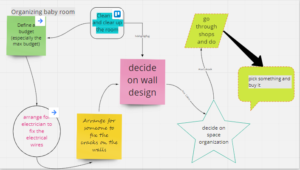
-Connection Line
Every object on the Miro board can show visual connection via the connection line feature. Connection lines can have text incorporated with them, either along the line or cutting into the line.
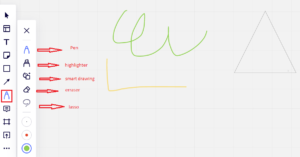
-Freehand writing
Since Miro is a white board, it is logical to have the option to have free hand writing, it can simulate writing with a pen or highlighter (you can change the size of the lines). Also you can use an eraser. There is an interesting option called smart drawing, where you can hand draw a shape, and miro’s AI detects the shape you are drawing and corrects the lines so your shape looks as its been perfectly drawn with a ruler. Then there is the lasso feature that enables you to group couple of objects together forming a rectangular form and you can group them together and for example move them together, resize them together.
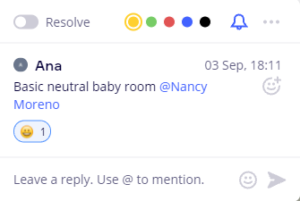
-Comment feature
You can leave comments on the board regarding anything, also as part of the comment you can tag a particular person (collaborator on the board). You can leave comments to raise issues about work done on some PBI and add emoticons as part of the comments, and even start a communication on a particular comment by using reply.
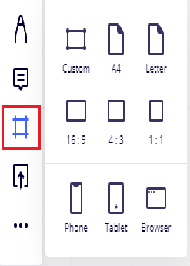
-Frames
Frames are essential to structure your content on the board and manage the big picture. They are also helpful for creating presentations or exporting a board. You can move frames, arrange content on frames in a grid-like mode, and hide content on frames from your collaborators’ view.
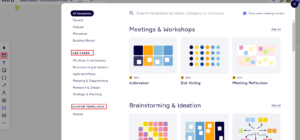
-Templates
Templates are also a widely used feature in Miro, because they are predesigned, quick to be set, and they are specified based on use, but you can also save a template of your own and use it when needed.
Eg. for Product and Sprint Backlog

– Link to feature
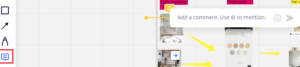
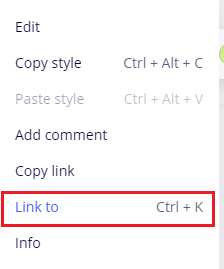
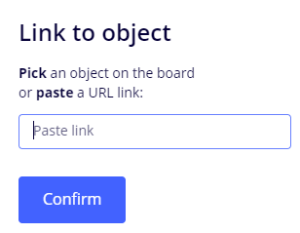
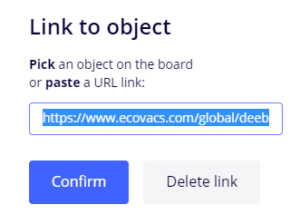
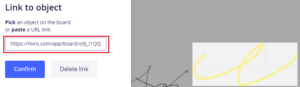
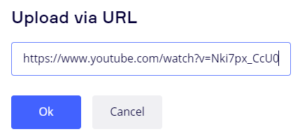
Very useful feature is the Link to feature with which you can connect items in different part of the board and even web pages/links that are outside of the board. You do this with right click on your mouse and selecting link to, then you select either an item on the board or you paste a copied link that could be opened just by clicking on the designated sticker, and you finish with clicking confirm.
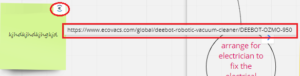
By clicking on the icon in the upper right corner the web site is directly opened
Or
![]()
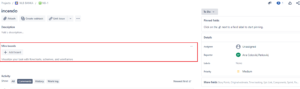
By clicking on the icon in the upper right corner Miro takes you directly to another item/object on the board (the yellow scribble that you see marked in the white rectangle). By the same logic for items/objects on the board eg. PBI in the Product Backlog, you can use this Link to option and connect the PBI from the board to a PBI from Jira or Trello.
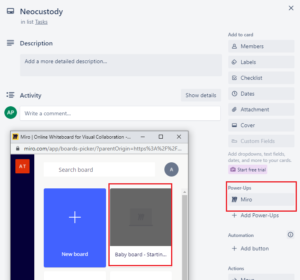
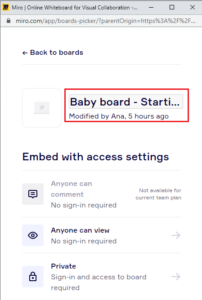
-Power ups
In Jira or Trello PBIs/Tickets by previously installing the power up option in Miro, you can attach a whole miro Board to Jira or Trello.
Eg. Jira
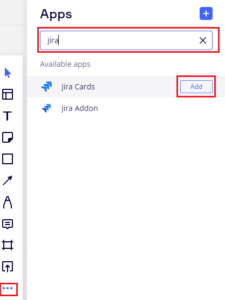
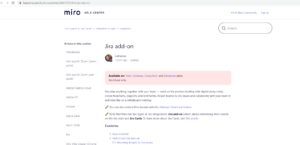 After clicking Add, a new page pops up from the miro help center, explaining to you the whole installation process.
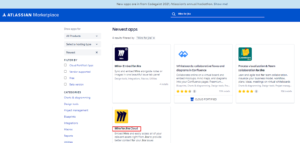
The installation process is standard for all Jira add-ons. First, log into your Jira with administrative rights, then download the add-on here (the app can also be found at the Atlassian Marketplace > Find new apps > Miro for Jira Cloud): click Get app and Get it now. And that’s all! The installation is complete.

To attach a board to a Jira issue, open the issue in Jira. Click Add Board in the Miro boards section. Bear in mind that this Jira option is only available for Miro accounts with paid plans.
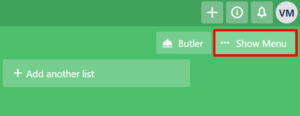
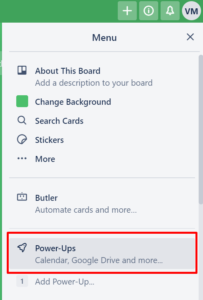
The installation process is standard for all Trello power ups. Open Menu on the right-hand side of a Trello board,Select the Power-Ups menu option,Find Miro on the list and click Add. Miro will appear in the Enabled Power-Ups

To attach a board to a Trello card, open the card, Click Miro in the Power-Ups section and select a board you want to add.
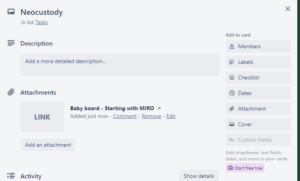
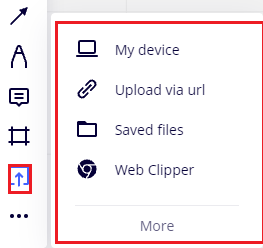
-Upload feature
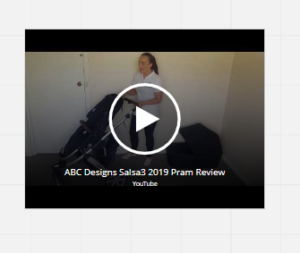
Miro offers a feature to upload documents, links, videos…
Eg. for videos – you can play the videos directly on the board
These are just a few of the basic features that Miro has to offer. Don’t be afraid to try it on your own, and trial and error is the best way to learn something, and do it frequently in order to remember it, if not there is always the internet :).

This is a great introductory article to Miro. I’m wondering if users find it as easy to use as a physical white board and if they prefer one or the other. Digital collaborative tools are incredibly useful these days but I wonder if they are preferred to more tactile ones.
Hey Natalie,
From experience I have to say that it took time to switch from physical white board to digital one. But since the pandemic hit, and also being global team, digital white boards have been god sent.
Interesting article on getting started with white boards and Miro in particular, the visual content add succinct mind mapping expression of need and usage, the below are the strengths i find in the article;
*Appropriate visual flow diagrams and images
*Straight to the point
*Structured and Synchronize layout
*Easy to follow with highlights in red and arrow indications.
Samuel,
I am glad that you found the article useful. What would you suggest would be weak points of the article? Should I do a follow up article?